I’m thankful to be alcohol free for 219 days.
I also plan on cooking my first turkey. I bought it yesterday, so it still needs a day or two to thaw.


I’m thankful to be alcohol free for 219 days.
I also plan on cooking my first turkey. I bought it yesterday, so it still needs a day or two to thaw.

I didn’t realize that this system has an agent, but I’m happy it does. Looks to be fairly simple to setup.
C:\winget install glpi-agent --custom="SERVER='http://glpi/' RUNNOW=1"
After installation I loaded up the URL, set the language and ran environment checks. Now I have to go through the output and make sure I’m cool with the warnings and such. I’m guessing I need to fix the permissions issue first, lol.

sudo chown www-data:www-data -R glpi for the permissions. The rest don’t look that serious since I don’t have the thing accessible from the web, but I may revisit.
Next step is the DB config. I could just feed it the root password to my mysql server, but I’m going to create a user just for this DB.
mysql> CREATE USER 'glpi_db'@'localhost' IDENTIFIED BY '********';
mysql> GRANT CREATE, ALTER, DROP, INSERT, UPDATE, DELETE,  SELECT, REFERENCES, RELOAD on *.* TO 'glpi_db'@'localhost' WITH GRANT OPTION;
mysql> FLUSH PRIVILEGES;
I don’t often get to do the rest with a GUI!

It created the DB without error. A couple other generic questions and a sales pitch and we’re done.

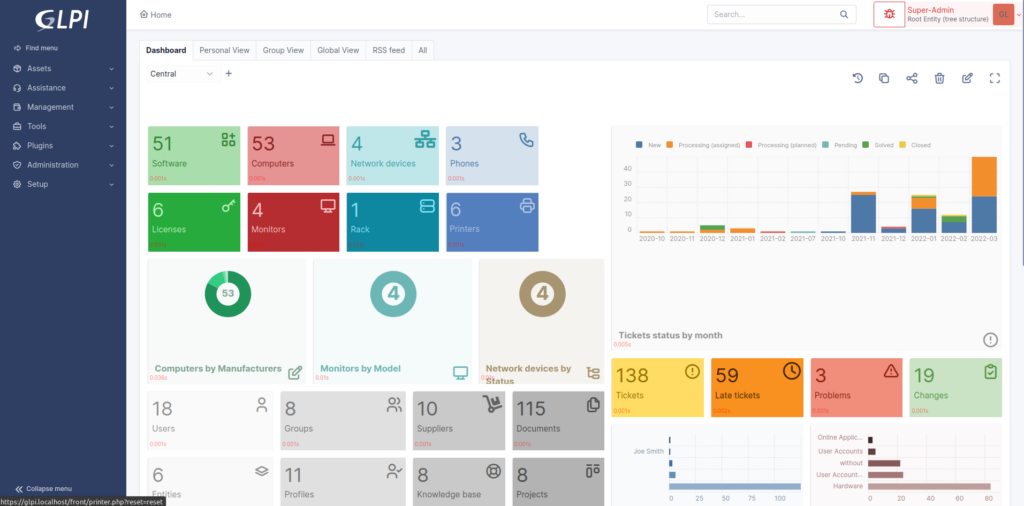
After signing in we get this nice little message so I gotta change some passwords to get rid of all that red.


I went to the Sun Fresh on Blue Parkway for the first time. It is a lot bigger than I expected. A lot nicer too, but my expectations were low.

I have a couple fairly complicated and hopefully long-term projects I’d like to do, and things are much easier to work on if I have a good way to store information about various components and incidents, so I’m going to see how hard it is to roll my own install of GLPI(Gestionnaire Libre de Parc Informatique, or “Free IT Equipment Manager”).

Downloaded this. Moved extracted folder to /var/www.
Create directories for configs, data, and logs.
GLPI_CONFIG_DIR: set path to the configuration directory;
config directory to this place.GLPI_VAR_DIR : set path to the files directory;
files directory to this place.GLPI_LOG_DIR : set path to logs files.
Create a inc/downstream.php file into GLPI directory with the following contents:
<?php
define('GLPI_CONFIG_DIR', '/etc/glpi/');

if (file_exists(GLPI_CONFIG_DIR . '/local_define.php')) {
   require_once GLPI_CONFIG_DIR . '/local_define.php';
}
Create a file in /etc/glpi/local_define.php with the following contents:
<?php
define('GLPI_VAR_DIR', '/var/lib/glpi');
define('GLPI_LOG_DIR', '/var/log/glpi');
Add info Apache virtual server. I’ll lock it down to my local network, so this won’t be accessible from the internet for now. Added to /etc/apache2/sites-enabled/glpi.conf.
<VirtualHost *:80>
        ServerName glpi

        ServerAdmin webmaster@localhost
        DocumentRoot /var/www/glpi/public

        ErrorLog ${APACHE_LOG_DIR}/glpi-error.log
        CustomLog ${APACHE_LOG_DIR}/glpi-access.log combined

    # If you want to place GLPI in a subfolder of your site (e.g. your virtual host is serving multiple applications),
    # you can use an Alias directive. If you do this, the DocumentRoot directive MUST NOT target the GLPI directory itself.
    # Alias "/glpi" "/var/www/glpi/public"

    <Directory /var/www/glpi/public>
        Require all granted

        RewriteEngine On

        # Ensure authorization headers are passed to PHP.
        # Some Apache configurations may filter them and break usage of API, CalDAV, ...
        RewriteCond %{HTTP:Authorization} ^(.+)$
        RewriteRule .* - [E=HTTP_AUTHORIZATION:%{HTTP:Authorization}]

        # Redirect all requests to GLPI router, unless file exists.
        RewriteCond %{REQUEST_FILENAME} !-f
        RewriteRule ^(.*)$ index.php [QSA,L]
    </Directory>


</VirtualHost>
I of course had to add an entry for glpi in the hosts file on my laptop for this to work.
Looks like it’s installed!

I got bored last night and started researching OpenWRT. There is no particular feature that it supports, that my current router firmware doesn’t, but I haven’t looked into the project in at least 10 years.
I currently run an ASUS AX-3000, which I bought because I thought my old Netgear X8 R8300 was malfunctioning, but when I had the same issue with the ASUS, I found it was a config problem. Since the Netgear is just sitting in the basement, I though I’d install OpenWRT on that first and then see if it’s worth it to install on the ASUS. The Netgear is a little more high end of a router, but it doesn’t have WiFi 6. The ASUS does, but has one less radio, so I’ll need to see how they perform.
Unfortunately, neither router has images prebuilt for it, so I had to build my own image. Luckily there was already a profile for an R8500, which hardware wise is almost identical to the model I have.
The build environment setup and instructions can be found here. It was a simple matter of firing up a Ubuntu VM and following along. I can’t flash it while I’m at work, so that will have to wait.
The most annoying thing with getting this setup is how confusing the OpenWRT documentation is. I can see why they would organize it this way. It seems to me that unless you have a router that one of the maintainers owns, you are left with manual. Even though it’s just linux, so you really just need the hardware support to get up and running. I would think a more broad generic image to test things would make more sense. Oh well.
cweb@testvmhost:~/openwrt-imagebuilder-bcm53xx-generic.Linux-x86_64$ make image \
PROFILE="netgear_r8500"
Generate local signing keys...
WARNING: can't open config file: /builder/shared-workdir/build/staging_dir/host/etc/ssl/openssl.cnf
WARNING: can't open config file: /builder/shared-workdir/build/staging_dir/host/etc/ssl/openssl.cnf
read EC key
writing EC key
Checking 'true'... ok.
Checking 'false'... ok.
Checking 'working-make'... ok.
Checking 'case-sensitive-fs'... ok.I’ve been wanting to switch my server setup to something virtual for a while now. I upgraded my “gaming” desktop to 32GB of RAM, but it was kind of pointless after I did some research. A processor, motherboard, and 32 GB of DDR4 RAM isn’t that much more. Then I got to wondering how much it would be just to put something together, and I came out under $500. Hmm, I waste more than that in a week sometimes.
I also tested out Fedora server as a Host system. I can’t say I really liked Cockpit at all.
I’m testing ubuntu right now, probably with virt-manager.
funny test vm host in vm guest on vm host
| Name | Item | Qty | Price | |
|---|---|---|---|---|
 | CPU | AMD Ryzen 5 4500 Renoir 3.6GHz 6-Core AM4 Boxed Processor – Wraith Stealth Cooler Included | 1 | $64.99 EACH |
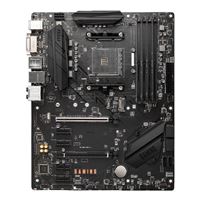
 | Motherboard | MSI B550 Gaming GEN3 AMD AM4 ATX Motherboard | 1 | $89.99 EACH |
 | RAM | Corsair Vengeance LPX 32GB (2 x 16GB) DDR4-3200 PC4-25600 CL16 Dual Channel Desktop Memory Kit CMK32GX4M2E3200C16 – Black | 1 | $50.99 EACH |
 | M.2 / NVMe SSD | Crucial P3 Plus 2TB 3D NAND Flash PCIe Gen 4 x4 NVMe M.2 Internal SSD | 1 | $112.99 EACH |
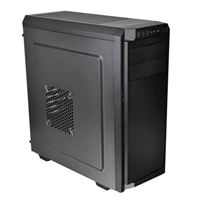
 | Case | Thermaltake V100 ATX Mid-Tower Computer Case – Black | 1 | $44.99 EACH |
 | Power Supply | Thermaltake Toughpower GX2 600W 600 Watt 80 Plus Gold ATX Non-Modular Power Supply | 1 | $69.99 EACH |
| Total | $433.94 | |||
| Generated by Micro Center 11/22/2024 4:38:04 AM |

This ended up being a lot more research for very little change, but I’m happy so far. I may still adjust some colors, but other than that I’m happy.

What I ended up spending the most time on was a simple feature that required php code to work. I wanted to set the first image in the post as the WP Feature Image for the post. I am really surprised this feature isn’t part of word press to be honest.
Here is the code that I had to add to my functions.php file.
// add support for Feature Image.  Pobably redundent as it should be in parent theme
add_theme_support( 'post-thumbnails' );

// // autoset_featured is a function that sets the featured image to the first image in the post
function autoset_featured() {
    global $post;
    $already_has_thumb = has_post_thumbnail($post->ID);
    if (!$already_has_thumb)  {
        $attached_image = get_children("post_parent=$post->ID&post_type=attachment&post_mime_type=image&numberposts=1" );
            if ($attached_image) {
                foreach ($attached_image as $attachment_id =>
                $attachment) {
                    set_post_thumbnail($post->ID, $attachment_id);
                }
            }
        }
    }
add_action('the_post', 'autoset_featured');
add_action('save_post', 'autoset_featured');
add_action('draft_to_publish', 'autoset_featured');
add_action('new_to_publish', 'autoset_featured');
add_action('pending_to_publish', 'autoset_featured');
add_action('future_to_publish', 'autoset_featured');
Unfortunately, there was several hours of research and missteps to get this working properly, and the way I wanted.
I started by reading the first several sections of the WordPress Developer Theme Handbook. This was more interesting than you’d think, and I know how a much better idea about where things go. Specifically, the functions.php file(in my child theme, which I now know I should create).
Then I found this person’s code and just copy and pasted it. Which sounds lazy, but I know what all the code does at the moment, which is nice.
I haven’t been happy with any of the themes I have installed on this site since I started it. WordPress sent a notice about the new 2025 default theme and it looks pretty nice, but still is not what I want. I’ve decided to just figure out how to create my own so I’ll stop getting like 70% of the way there only to find that I can’t change what I want to change. I started messing around but it was really annoying trying to test things out and not break the site at the same time. Luckily I still have chrisweber.online so I’ll setup a test site on that. Actually, I’ll probably just copy over the Zion site to it for testing.
I’m hoping if I read through a couple tutorials on how the templates work and get at least something basic completed this week.